What are docker images ?
4/27/2025
A docker image is a standardized package containing all the files needed to run your container.
That’s a quite simple definition, there is a lot to discuss here.
A simple image
Let’s start our journey with a very simple image consisting of a single binary.
Here is a little Go program which echoes what it reads from its standard input.
package main

import (
	"bufio"
	"fmt"
	"os"
)

func main() {
	scanner := bufio.NewScanner(os.Stdin)
	for scanner.Scan() {
		fmt.Println("Echo says:", scanner.Text())
	}
	if err := scanner.Err(); err != nil {
		fmt.Fprintln(os.Stderr, "reading standard input:", err)
	}
}
If you compile and run it, you can see it working:
$ go build echo.go
$ echo "Hello world" | ./echo
Echo says: Hello world
Since our program is “standalone” it does not need any other libs, files, etc… to run.
We can build a Docker image containing only our program by writing the following Dockerfile:
FROM scratch

ADD echo .

CMD ["./echo"]
scratch is a special purpose image useful when you don’t want to depend on a base image, it actually does nothing.
Okay let’s build our image.
$ docker build -t echo .
[+] Building 0.1s (5/5) FINISHED                                                                                         docker:default
 => [internal] load build definition from Dockerfile                                                                               0.0s
 => => transferring dockerfile: 77B                                                                                                0.0s
 => [internal] load .dockerignore                                                                                                  0.0s
 => => transferring context: 2B                                                                                                    0.0s
 => [internal] load build context                                                                                                  0.0s
 => => transferring context: 28B                                                                                                   0.0s
 => [1/1] ADD echo .                                                                                                               0.0s
 => exporting to image                                                                                                             0.0s
 => => exporting layers                                                                                                            0.0s
 => => writing image sha256:9bdcba1ae952257ee70e4e6435f8de08ed6519297f46874f41512ee9dd159289                                       0.0s
 => => naming to docker.io/library/echo
Now we should have an image named echo containing our binary.
$ docker image ls | grep echo
echo                          latest          9bdcba1ae952   3 minutes ago    2.22MB
As we can see, the image is 2.22MB, which is about the same size as our echo program.
$ ls -lh ./echo
-rwxr-xr-x 1 me me 2.2M Apr 26 23:35 ./echo
Let’s try to create a container based on our image to see if it works.
$ docker run --rm -i echo
It works !
Echo says: It works !
We need the -i option to keep stdin open or our program would terminate immediately.
We could also tell docker to attach to stdin/stdout of the container so we could do something like this:
$ echo "It works !" | docker run --rm -a stdin -a stdout -i echo
Echo says: It works !
Note that the first “echo” is the echo command on my system, not our little echo program.
Ok, now our image is valid, functional, let’s see what it contains.
Inspecting the image
$ docker image inspect echo | jq '.[0]|{Architecture,Os,GraphDriver,RootFS}'
{
  "Architecture": "amd64",
  "Os": "linux",
  "GraphDriver": {
    "Data": {
      "MergedDir": "/var/lib/docker/overlay2/wr4ccadsvalh63exuv3vxzpsb/merged",
      "UpperDir": "/var/lib/docker/overlay2/wr4ccadsvalh63exuv3vxzpsb/diff",
      "WorkDir": "/var/lib/docker/overlay2/wr4ccadsvalh63exuv3vxzpsb/work"
    },
    "Name": "overlay2"
  },
  "RootFS": {
    "Type": "layers",
    "Layers": [
      "sha256:10cefa7f816fc5f598f5d3c4076156133a41ebbe453e8ce3dc536d6a2e08cf1a"
    ]
  }
}
Docker provides the inspect command to see the details of an image.
I filtered the JSON output with jq to show only relevant fields.
Our image is amd64/Linux which is the architecture of the computer I’m running the commands on.
It is something important to keep in mind, trying to create a container on a x86_64 arch with this image would not work !
Next we have insights about the storage driver used by docker for this image.
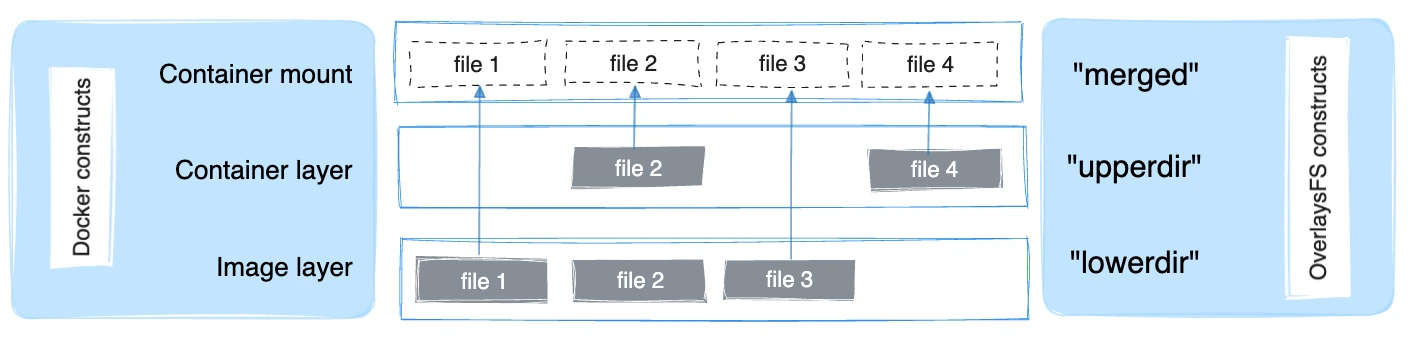
It uses the driver overlay2, which means is uses the OverlayFS.
An overlay filesystem is comprised of 3 layers:
- a lower layer, readonly: typically your docker image (composed of one or many layers)
- an upper layer, read/write: changes/new files would be put there
- a merged layer: what’s mounted for your container, a merged view of the upper/lower layers
The “WorkDir” you saw is an internal layer used by OverlayFS.
Note that when you change a file from the lower layer, it is copied on the upper layer, hence “shadowing” the original file.
Here is a more visual way to describe the filesystem (from Docker documentation):
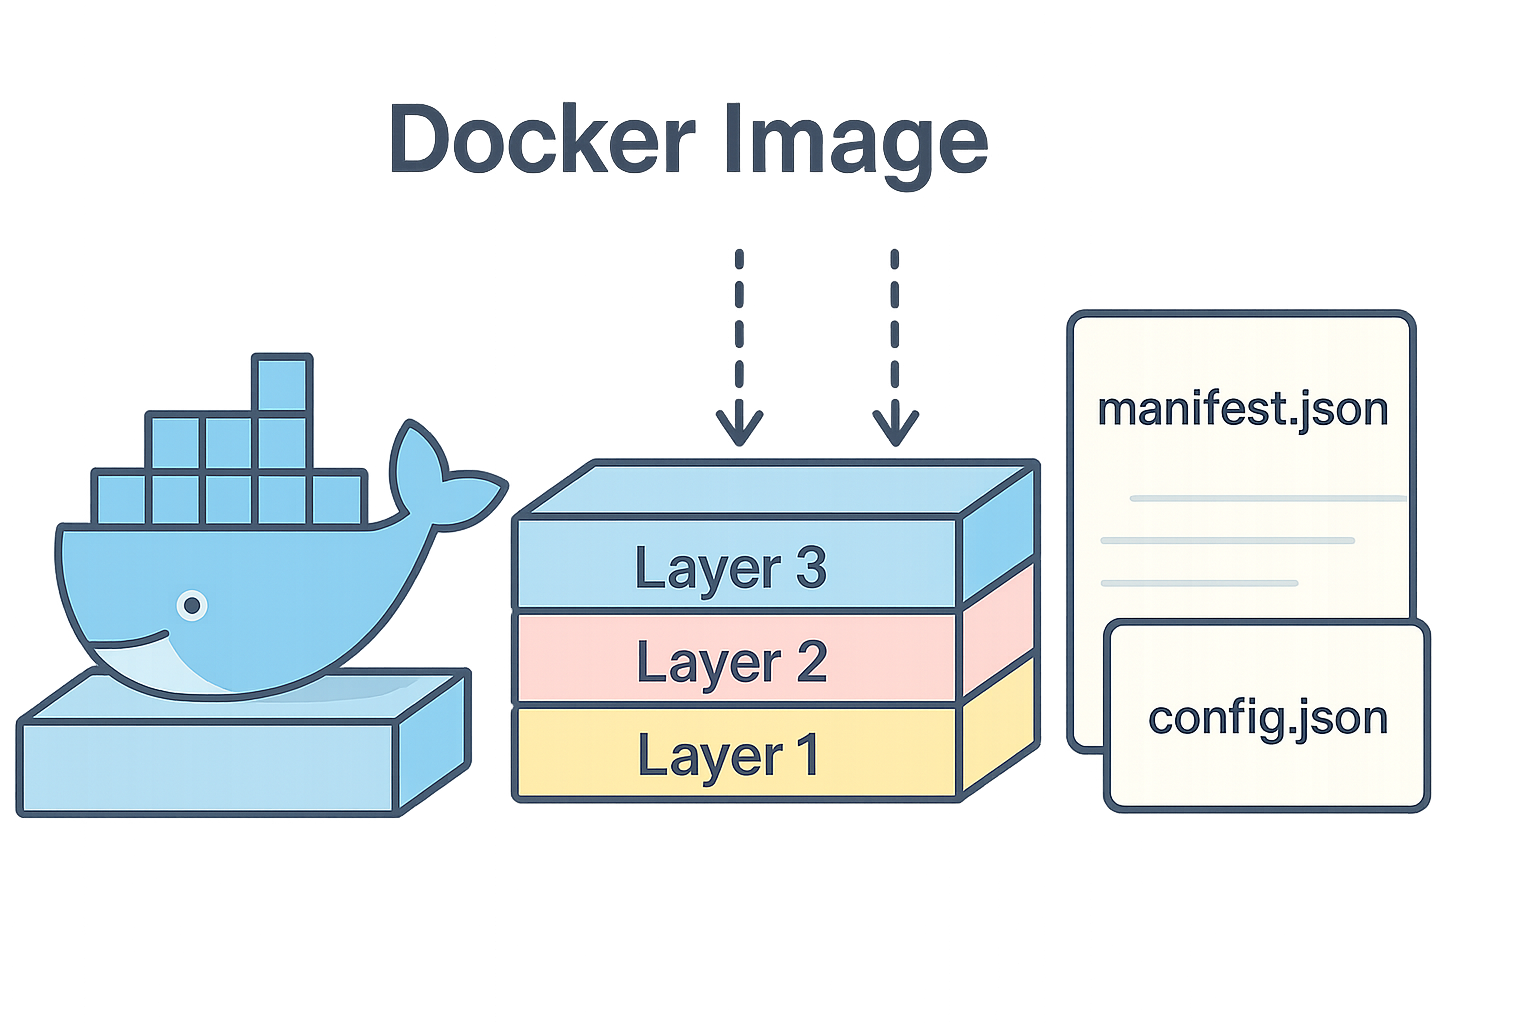
Next we have the RootFS part, which shows how many layers your docker image is composed of.
Here we have only one layer where you can see the sha256. This layer is related to our “ADD ./echo” in the Dockerfile.
Now let’s see what an actual image looks like ? What file format are we dealing with ?
Docker image ? Just tar all the things
You could think the Docker image format is a fancy file format that only wizards (and machines) can understand.
But a Docker image is nothing more than a bunch of files in a tar archive.
This is now standardized by the Open Container Initiative.
The OCI image format specification is defined here.
Let’s look at it.
$ docker save echo > echo.tar
$ tar -tvf echo.tar
drwxr-xr-x 0/0               0 2025-04-26 23:40 blobs/
drwxr-xr-x 0/0               0 2025-04-27 01:00 blobs/sha256/
-rw-r--r-- 0/0         2223616 2025-04-26 23:40 blobs/sha256/10cefa7f816fc5f598f5d3c4076156133a41ebbe453e8ce3dc536d6a2e08cf1a
-rw-r--r-- 0/0             609 2025-04-26 23:40 blobs/sha256/9bdcba1ae952257ee70e4e6435f8de08ed6519297f46874f41512ee9dd159289
-rw-r--r-- 0/0             802 2025-04-26 23:40 blobs/sha256/e1bf37d8029f0ea5c4e1ff737fa3720655ffcea1793976fe89c2c0e366732645
-rw-r--r-- 0/0             400 1970-01-01 01:00 blobs/sha256/f19aa29c4e36721ea45d62be4f92f2e9b264407dfcf56c8643b39f5fac70ff67
-rw-r--r-- 0/0             360 1970-01-01 01:00 index.json
-rw-r--r-- 0/0             455 1970-01-01 01:00 manifest.json
-rw-r--r-- 0/0              31 1970-01-01 01:00 oci-layout
-rw-r--r-- 0/0              87 1970-01-01 01:00 repositories
Our image containing the echo program is in the blobs/sha256 folder.
Other blobs are metadata/config files related to the OCI image format.
Let’s extract everything it will be easier to work with it.
$ mkdir echo-extracted
$ tar -xvf echo.tar -C echo-extracted
$ cd echo-extracted/ && ls
blobs  index.json  manifest.json  oci-layout  repositories
Ok now let’s see what kind of file is our actual docker image:
$ file blobs/sha256/10cefa7f816fc5f598f5d3c4076156133a41ebbe453e8ce3dc536d6a2e08cf1a
blobs/sha256/10cefa7f816fc5f598f5d3c4076156133a41ebbe453e8ce3dc536d6a2e08cf1a: POSIX tar archive
The docker image is another tar archive, let’s see what’s in there and extract the files.
$ tar tvf blobs/sha256/10cefa7f816fc5f598f5d3c4076156133a41ebbe453e8ce3dc536d6a2e08cf1a
-rwxr-xr-x 0/0         2221936 2025-04-26 23:35 echo
$ mkdir extracted-image && tar xf blobs/sha256/10cefa7f816fc5f598f5d3c4076156133a41ebbe453e8ce3dc536d6a2e08cf1a -C $_
As you can see, the tar archive contains our little program, all good.
After extracting it I can use it like a classic go program on my machine.
$ extracted-image/echo
So we meet again
Echo says: So we meet again
We can even recalculate the SHA256 checksum of the tar file to see if it’s the same
$ sha256sum blobs/sha256/10cefa7f816fc5f598f5d3c4076156133a41ebbe453e8ce3dc536d6a2e08cf1a  | cut -d' ' -f1
10cefa7f816fc5f598f5d3c4076156133a41ebbe453e8ce3dc536d6a2e08cf1a
That’s it for now, this simple image was enough to understand what is a container image and how it is represented. More complex images have multiple layers, usually created by commands like
- FROM
- ADD
- RUN
Those layers are combined to present a single read-only layer as a base for the container to work.
At my previous job we usually based our images on Alpine Linux, which is a small Linux distribution, but be aware that Alpine Linux uses musl and not glibc, which may prevent some of your programs to run.
You could also be interested into distroless images (which is kind of what we did there).
Dealing with small images is not only about storage, network I/O but also about attack surface area.